Last Updated on October 10, 2026 by Ellen
Learning how to photograph vintage jewelry for eBay can make a big difference in how shoppers see your listings. Whether you’re selling vintage brooches, costume jewelry, necklaces, or earrings, clear photographs help buyers understand exactly what they’re purchasing.
Posts may be sponsored. This post contains affiliate links, which means I will make a commission at no extra cost to you should you click through and make a purchase. As an Amazon Associate I earn from qualifying purchases.
You don’t need an expensive camera or professional photography studio to take good jewelry pictures. A smartphone, a simple background, and the right lighting can produce attractive photos that show important details.
Here are my tips for taking better eBay jewelry photographs at home, even when you don’t have much natural light.
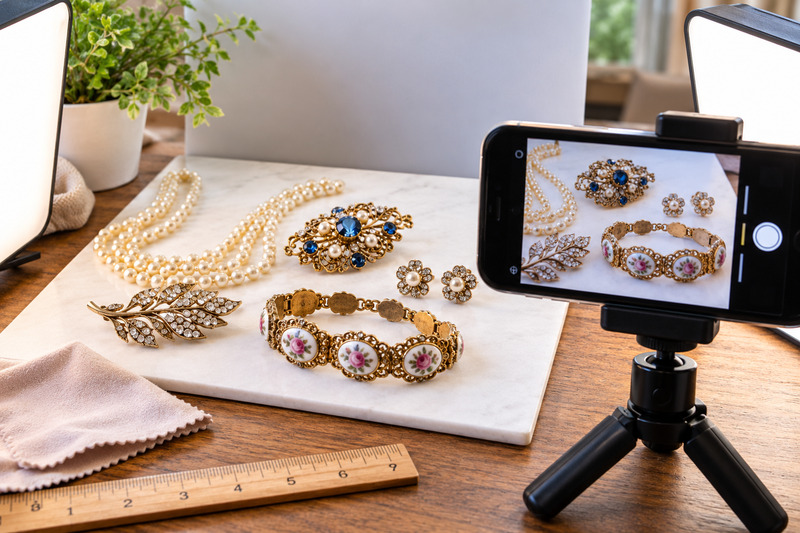
Why Good Jewelry Photos Matter on eBay
Vintage jewelry can be difficult to photograph because many pieces are small, reflective, or covered with tiny details.
A photograph that looks blurry or too dark may hide the features that make an item special.
Good jewelry photographs should help buyers see:
- The overall design and color
- The condition of the jewelry
- Maker’s marks, signatures, or stamps
- The clasp, pin, or other fastening
- Measurements and proportions
- Missing stones, scratches, or other flaws
Remember that online shoppers cannot pick up an item and examine it themselves. Your photos need to answer as many of their questions as possible.
1. Find the Best Lighting in Your Home
Lighting is one of the most important parts of photographing jewelry.
Direct sunlight can create harsh shadows and bright reflections on metal, rhinestones, and polished stones.
Instead, try taking pictures near a window with indirect daylight.
A table near a window can work well, especially when the sun isn’t shining directly onto your jewelry.
What if your house doesn’t have much natural light?
You can still take attractive jewelry photographs without a bright, sunny room.
Try using a small LED photography light or two adjustable lamps with matching daylight-colored bulbs.
Position the lights to the sides of the jewelry rather than pointing them directly at reflective surfaces.
A thin white diffuser made for photography can help soften harsh light. Keep fabric and paper away from hot bulbs.
Avoid mixing warm yellow room lighting with cool daylight when possible. Mixed lighting can make gold, silver, and gemstones appear to be the wrong color.
2. Choose a Simple Background
A busy background can distract buyers from the jewelry you’re trying to sell.
For most vintage jewelry, simple backgrounds work best.
Consider using:
- White or light gray poster board
- A neutral photography backdrop
- Plain, wrinkle-free fabric
- A clean matte surface
Dark jewelry often stands out against a light background, while pale or silver jewelry may photograph better against a contrasting neutral color.
Try to avoid highly textured materials that compete with small jewelry details.
You don’t need a different background for every piece. A few inexpensive surfaces are usually enough.
3. Clean the Jewelry Carefully Before Photographing
Dust, fingerprints, and loose lint can become surprisingly noticeable in close-up photographs.
Before taking pictures, inspect each piece carefully.
A soft, dry microfiber cloth can remove loose dust from many items.
However, don’t automatically wash or polish vintage jewelry. Water, cleaning solutions, and polishing products can damage certain finishes, glued stones, plated surfaces, and delicate materials.
Some vintage pieces also have a desirable aged finish or patina that shouldn’t be removed.
If you’re unsure how to clean something safely, leave it as found and describe its condition accurately.
4. Use Your Phone’s Camera Correctly
Modern smartphones can take excellent jewelry photographs, but getting a sharp close-up sometimes requires a little practice.
Start by cleaning your phone’s camera lens.
Place the jewelry on your chosen background and hold your phone steady.
Tap the jewelry on your screen to set the focus. If the image looks too bright or too dark, adjust the exposure before taking the picture.
Don’t get too close
One of the most common mistakes is moving the phone so close that the camera cannot focus.
If the jewelry looks blurry, move your phone farther away.
You can crop the photograph afterward, provided the original image has enough detail.
If your phone has a dedicated macro mode, try it for small markings and decorative details.
Avoid excessive digital zoom, which can reduce image quality.
5. Take Several Photos of Each Piece
One photograph is rarely enough for a vintage jewelry listing.
Buyers want to see the item from different angles, especially when purchasing older or collectible pieces.
For a vintage brooch, photograph the front, back, clasp, and any maker’s mark.
For a necklace, include the entire necklace, clasp, pendant, and a photograph showing the length.
For earrings, show both earrings together, their backs or clips, and any visible markings.
For bracelets, photograph the full design, clasp, and any signs of wear.
You should also include clear pictures of damage or imperfections.
A small scratch or missing rhinestone may not prevent a sale, but buyers should know about it before purchasing.
6. Photograph Jewelry Maker’s Marks and Signatures
Vintage jewelry collectors often look for specific designers and manufacturers.
A maker’s mark can be one of the most important details in your eBay listing.
Look for markings on:
- The backs of brooches
- Necklace clasps
- Earring clips and posts
- Bracelet clasps
- The inside surfaces of rings
Try photographing the mark in bright, indirect light.
If the camera won’t focus, move farther away and crop the image afterward.
A small phone tripod can also help reduce camera shake.
Don’t identify a piece as a particular brand unless you have enough evidence to support that identification. Similar designs and hardware can appear on jewelry from different manufacturers.
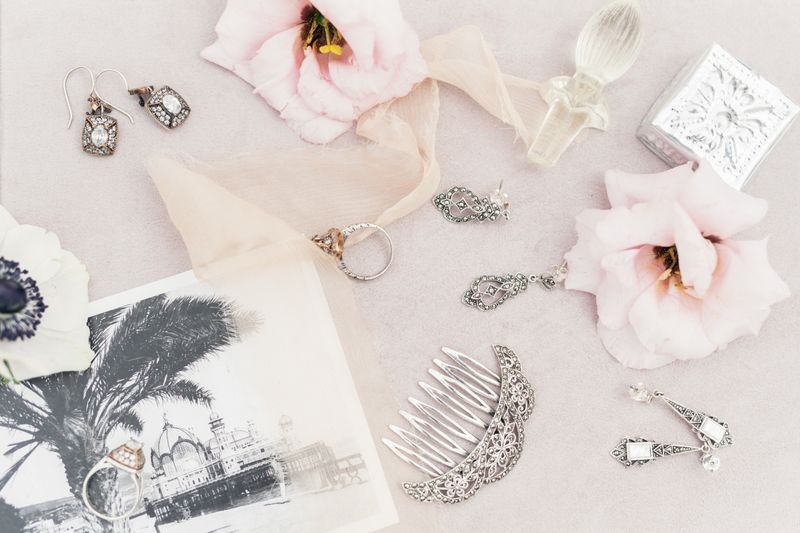
7. Reduce Glare on Rhinestones and Metal
Photographing rhinestone jewelry can be especially frustrating.
The stones may sparkle beautifully in person but appear as white spots or dark shapes in a photograph.
To reduce glare, change the angle of your light or move the jewelry slightly.
Sometimes a small adjustment makes a noticeable difference.
Avoid using your phone’s flash when it creates strong reflections.
Soft, indirect light usually gives you more control over the final image.
You can take one additional photograph that shows how the stones reflect light, but make sure your other pictures accurately represent their colors.
8. Include Measurements in Your Photos
Measurements help buyers decide whether a piece of jewelry is the right size.
A photograph with a ruler can be particularly useful for vintage brooches, pendants, and earrings.
For necklaces and bracelets, measure the full wearable length and include that information in the listing description.
Don’t rely on photographs alone to communicate size.
A close-up picture can make a tiny brooch look much larger than it actually is.
If you’re selling vintage rings, use an appropriate ring-sizing tool rather than guessing the size from a ruler.
9. Photograph Flaws Honestly
Vintage jewelry doesn’t have to look brand new to be desirable.
However, condition matters.
Check for loose stones, missing rhinestones, worn plating, bent pins, damaged clasps, and discoloration.
Photograph any noticeable flaws clearly.
Avoid using filters or heavy editing to hide wear or change the jewelry’s appearance.
Your goal is to make the piece look attractive while still showing its actual condition.
Accurate photographs and descriptions help buyers make informed decisions and may reduce misunderstandings after a sale.
10. Edit Your Photos Without Changing the Jewelry
You can make small adjustments to improve the clarity of your pictures.
Cropping away unnecessary background space, straightening a crooked image, or correcting an inaccurate exposure can make a photograph easier to view.
However, avoid editing that changes the color of gemstones, removes scratches, or makes worn metal look new.
Compare your finished photograph with the actual jewelry before uploading it.
The colors and condition should look as close to the real item as possible.
Inexpensive Jewelry Photography Supplies Worth Having
You can start photographing jewelry with equipment you already own.
If you regularly sell vintage jewelry, a few inexpensive supplies may make the process easier.
Small phone tripod: Helps keep your phone steady when photographing tiny details and maker’s marks.
LED photography light: Useful when you need more consistent lighting indoors.
Neutral photography backdrop: Creates a clean, consistent appearance across your eBay listings.
Microfiber cloth: Helps remove dust and fingerprints from suitable surfaces.
Small ruler: Makes it easy to show buyers the dimensions of brooches, pendants, and earrings.
You don’t need to buy everything at once. Start with your phone and a simple background, then add supplies if you find yourself needing them.
Common Jewelry Photography Mistakes to Avoid
If your jewelry photographs aren’t turning out the way you want, check for these common problems.
Blurry close-ups: Move your phone farther away, improve the lighting, and tap to focus.
Yellow-looking silver jewelry: Avoid mixing different types of lighting.
Bright white reflections: Soften or reposition your light source.
Distracting backgrounds: Use a plain, neutral surface.
Missing detail photographs: Include clasps, maker’s marks, backs, and flaws.
Inaccurate colors: Check your photos against the actual item before publishing.
Frequently Asked Questions
What is the best background for photographing vintage jewelry?
A plain white, light gray, or other neutral background works well for most pieces. Choose a color that provides enough contrast to make the jewelry easy to see.
Can I photograph jewelry for eBay with an iPhone or Android phone?
Yes. Many smartphones can take sharp, detailed photographs suitable for eBay listings. Good lighting, accurate focus, and a steady camera are more important than buying expensive equipment.
How do I photograph tiny jewelry markings?
Use indirect lighting and your phone’s macro mode if available. If the camera won’t focus, move slightly farther away and crop the photograph afterward.
Should I photograph damaged vintage jewelry?
Yes. Include clear photographs of noticeable flaws, such as missing stones, worn plating, or broken clasps. Describe those issues in the listing as well.
Do I need a light box to photograph jewelry?
No. A light box can be helpful for consistent lighting, but it’s not essential. You can begin with a neutral background and indirect window light or a simple LED light.
Final Thoughts on Photographing Vintage Jewelry for eBay
Learning how to photograph vintage jewelry for eBay doesn’t have to be complicated.
Start with a clean background, soft lighting, and your smartphone. Take several photographs of each piece, including close-ups of maker’s marks, fastenings, and any imperfections.
The most important thing is to give buyers a clear, accurate picture of what they’re purchasing.
Once you develop a simple photography routine, preparing jewelry listings can become faster and easier.
If you’re still deciding what items to sell, read my guide on how to tell if something is worth reselling.

Ellen is a serial entrepreneur who owns 9 profitable blogs, two printable stores, an online vintage jewelry business, and a variety of other work at home endeavors. She shares tips for working at home successfully.