Last Updated on October 18, 2020 by Ellen
These website alert banner tips will help you grow your email list and improve your conversion rate for your e-commerce site. Get started now.
Posts may be sponsored. This post contains affiliate links, which means I will make a commission at no extra cost to you should you click through and make a purchase. As an Amazon Associate I earn from qualifying purchases.
I love tips that help improve conversation rates because face it, that’s my bottom line. The more readers I have that sign up for my newsletter or purchase a product or service, the more money bloggers and e-commerce site owners earn. And, one of the best ways to do that is with a notification bar.
You may want to add a countdown timer to your posts.

Website Alert Banner Tips
So, a website alert banner, otherwise known as a website notification bar is a small banner that loads at the top of your website that gives your visitors important information. One of the reasons that these are so successful is that unlike popups, they don’t get in the way of any content your reader wants to see.
You have probably seen a few of these yourself. They can take the form of a countdown banner that tells you that you have only 2 hours left to buy this product or service before the special discount is gone.
Or, another example is a banner that tells you about a special freebie when you sign up for a newsletter. Here are just a few other things they can do:
- Share a promotion
- Grow your email list
- Make a countdown timer
- Inform visitors of a change of address or hours
- Provide emergency information
How can I make a website alert banner?
I am all about easy solutions so this is the easiest way to make website alert banner on your site. I do not have time to code or change CSS.
- You need a plugin like OptinMonster to make this process simple. Download it and activate it.
- Log into your account and click on “Create new campaign”
- Pick the type of campaign you want which in this case is “Floating Bar”
- Pick the template. There are lots of different colors (over 50) so you can match it to your blog design very easily. But, you can build one from scratch if you want to as well.
- Customize the settings to make it float at the top of your page.
- Change the text to make it say what you want to.
- Edit the settings if you want to. You can change the width, alignment, color, icon, spacing, decoration, and border. There are so many ways to change your website alert banner with OptinMonster.
- Create a call to action and the URL you want your banner to take your reader to.
That’s all there is to making a notification bar. But, there is one more thing you will want to do to make this really effective. You can change the amount of on-time page time for your website alert banner.
Do you want to show your banner immediately? Or, do you want to wait until your customer has been on the page for 5 seconds or longer? It’s totally up to you and can be changed easily.
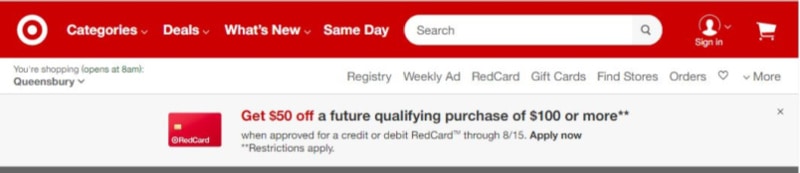
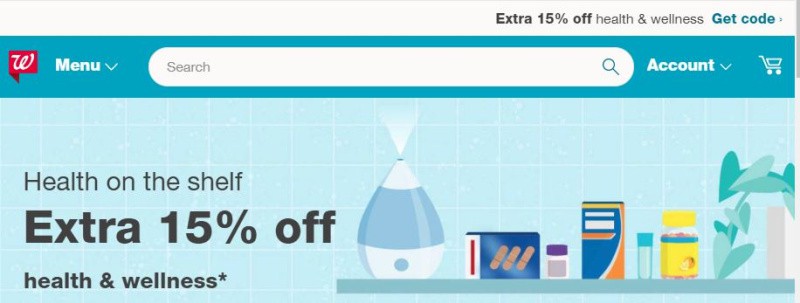
Website notification bar examples
There are so many different website alert examples out there. You have probably seen them on many of your favorite e-commerce sites like Walmart, Amazon, and Target. But, here are just a few.
So, what do you need to get started making a website alert banner? Just Download this Plugin now and get started.
Related reading

Ellen is a serial entrepreneur who owns 9 profitable blogs, two printable stores, an online vintage jewelry business, and a variety of other work at home endeavors. She shares tips for working at home successfully.